

Building a Node.js App with Postgres Database on Render: A Step-by-Step Guide (Beginner Friendly)


If you just started out in Backend Engineering with NodeJS and are actively learning (like I am/was at the time of writing this article), you would probably hassle a little bit with deploying your Node apps. Heroku used to be the hero in this case, but since it canceled its free subscription, the tussle began. Although you could easily use alternatives Vercel or Render to host your projects with a MongoDB database for example, it gets trickier when you want to host one with Postgres - a relational database which in many scenarios, is taught to beginners using local instances. As at this time, I also really couldn't find any YouTube video to answer my questions and documentations weren't hitting the nail for me. But I somehow figured it out. Hence, this article. I do hope it's helpful!
This article will cover the following:
Overview of technologies and key terminologies
Creating an account on Render
Building a simple NodeJS API
Creating a Postgres Database on Render
Connecting the NodeJS API with the Database
Deploying the entire project on Render
Overview of technologies and key terms
Buzzwords are vibe killers, I know. But no matter how often people use them to try to sound smart, it's important to know them. They are very important for
understanding the rest of this tutorial.
Deployment: refers to the process of making an application available and ready for use by end users. It involves moving the application's code and resources from a development environment to a production environment where it can be accessed by users. This process typically involves installing and configuring the application on servers or cloud-based platforms, and ensuring that it is running smoothly and securely. The actual process of deploying may be tricky and time-consuming, especially for beginners (and even for pros). Hence, we have platforms like Render that take away the need to do all the infrastructural setup and just move from a local machine to getting a URL to showcase your project.
Backend App: is the part of a software system that runs on the server-side and is responsible for processing data, performing calculations, and responding to requests from the front-end or client-side of the application. It handles the logic and functionality of the application that is not directly visible to the end-user, such as managing databases, processing payments, and authenticating users.
In this tutorial, we'd be using Node.js, Express.js, PostgreSQL and Render. Let's talk a bit about them as well.
Node.js: is an open-source, cross-platform JavaScript runtime environment built on Google's V8 JavaScript engine. It allows developers to run JavaScript code on the server-side, rather than just in a web browser, which makes it possible to build scalable and high-performance applications using JavaScript. Node.js provides a set of built-in modules for handling common web development tasks such as creating HTTP servers, working with file systems, and handling requests and responses. It also has a vast ecosystem of third-party modules and packages that developers can use to enhance the functionality of their applications. Node.js is widely used for building web servers, APIs, real-time applications, and command-line tools.
Express.js: is a popular open-source framework for building web applications in Node.js. It provides a set of tools and features for creating web servers, handling HTTP requests and responses, and routing requests to specific endpoints or URLs. Express.js is built on top of Node.js and uses the same non-blocking I/O model, making it well-suited for building scalable and high-performance web applications. Express.js is widely used for building web applications, RESTful APIs, and single-page applications (SPAs).
PostgreSQL: (also known as Postgres) is a powerful open-source relational database management system (RDBMS). It is known for its robustness, reliability, and support for advanced features such as transactions, stored procedures, and user-defined functions. PostgreSQL is designed to store and manage large amounts of data, and it can handle complex workloads with high concurrency and performance. It supports a wide range of programming languages and has a flexible data model that can handle structured, semi-structured, and unstructured data. PostgreSQL is widely used in web applications, data analysis, and other areas where a reliable and scalable database is required. It is free and open-source software that can be installed on a variety of operating systems, including Windows, Linux, and macOS.
Render: is a cloud platform that provides a complete solution for deploying and scaling web applications, APIs, and background workers. It offers a range of services including web hosting, managed databases, automatic SSL, and continuous deployment. Render supports a wide range of programming languages and frameworks, including Node.js, Python, Ruby on Rails, and Docker containers. Render's platform is built on top of modern cloud infrastructure, which ensures high availability, scalability, and security for its customers. It also provides a simple and intuitive user interface, making it easy for developers to deploy and manage their applications. With Render, developers can focus on building their applications and leave the infrastructure management to the experts.
With all the terms properly understood, and out of the way, let's get our hands dirty.
Creating an account on Render
To deploy your project on Render, you'd need to have an account. The process is quite very direct:
Visit https://render.com
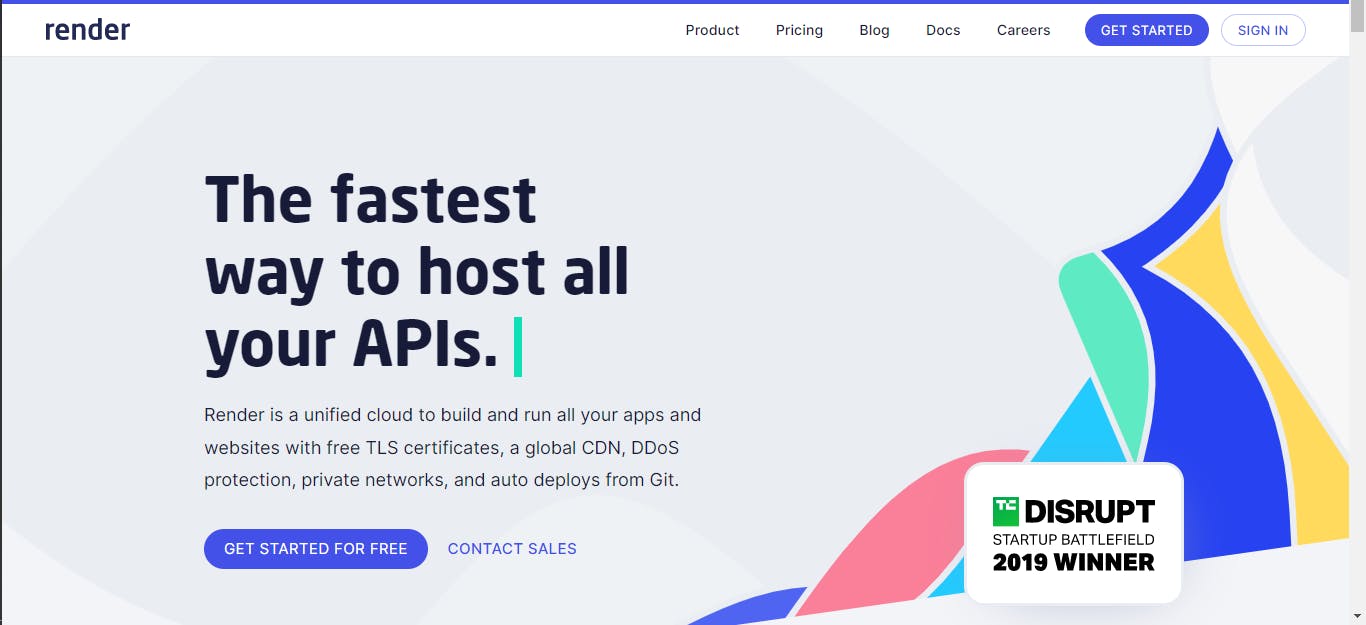
Click the GET STARTED(/SIGN IN if you have an account) button at the top-right corner
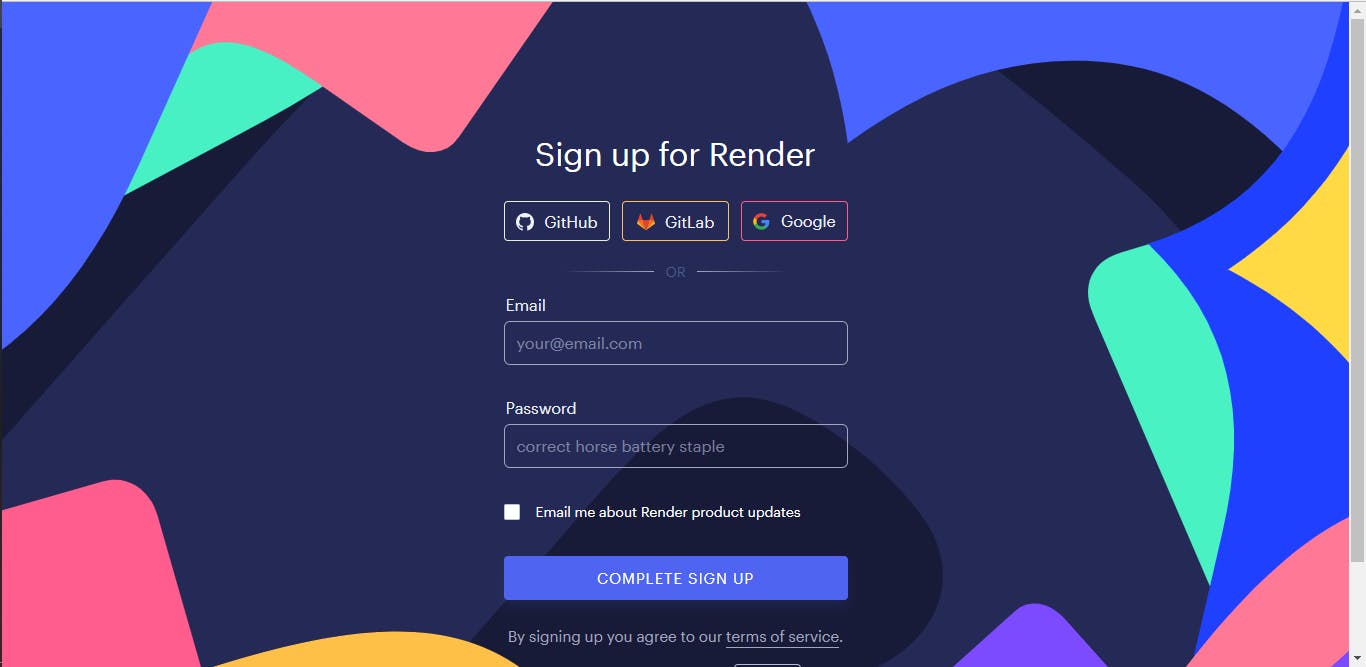
Register either with any of the listed accounts or via the traditional email method. After verifying your email, you would be redirected to your dashboard.
And Voila! We are good to go.
Building a Simple Node.js app
We will be building a simple application that can send requests to get data from a database and insert data into it. With this, it's assumed that all other CRUD (Create, Read, Update and Delete) operations will be easier to implement. To continue, you will need to have Node installed on your computer, have a good code editor/IDE and also have a good understanding of JavaScript (and Node) and how to use the Command Line. You can learn about all of these and more in this very detailed career path in Backend Engineering by Codecademy
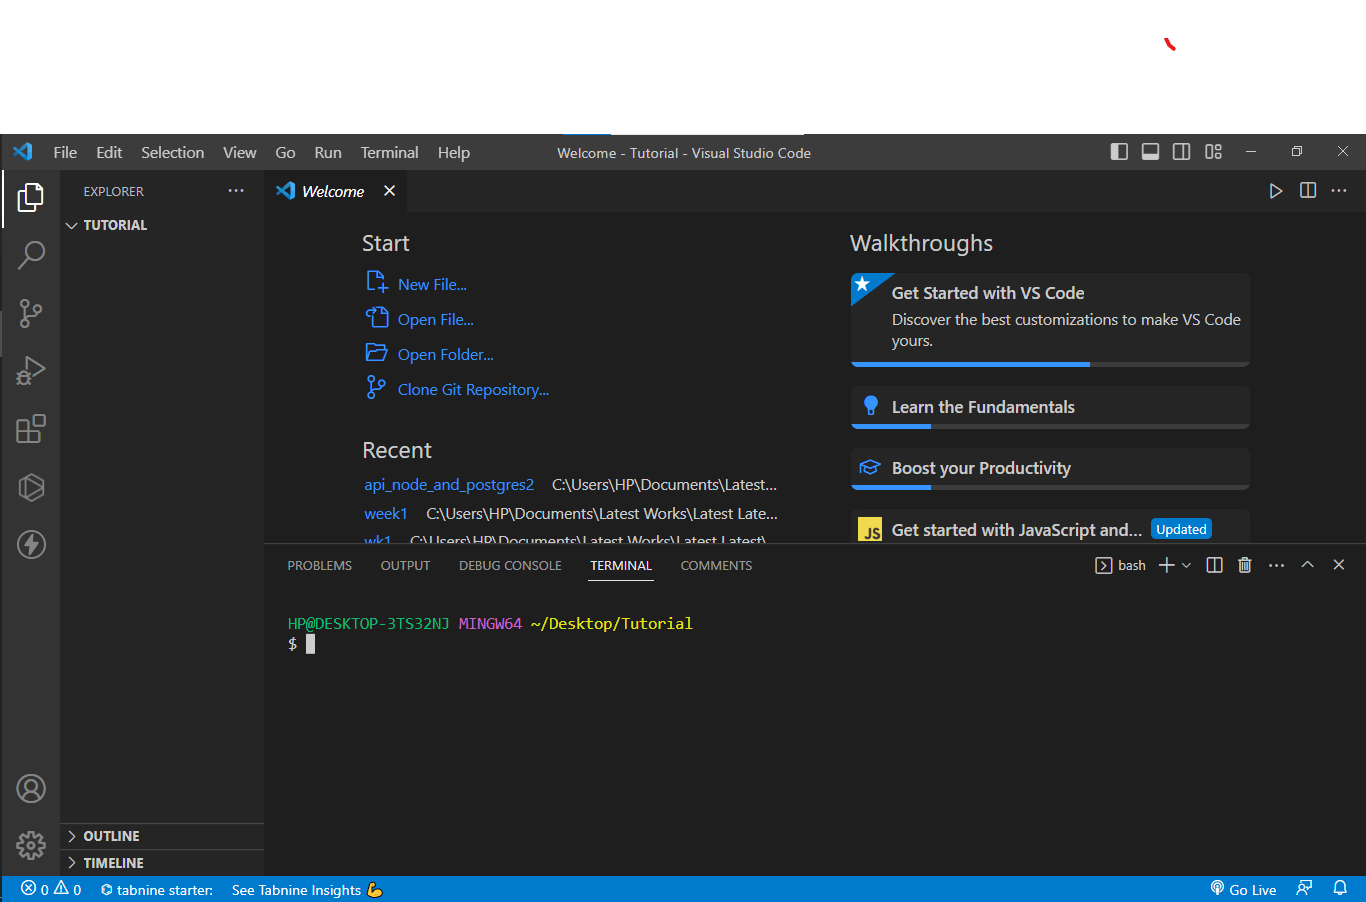
Create a new project folder. There are many ways to do this. But let's create from inside our IDE: Visual Studio Code. Click on "Open Folder" and then choose a folder or create a new one to use.
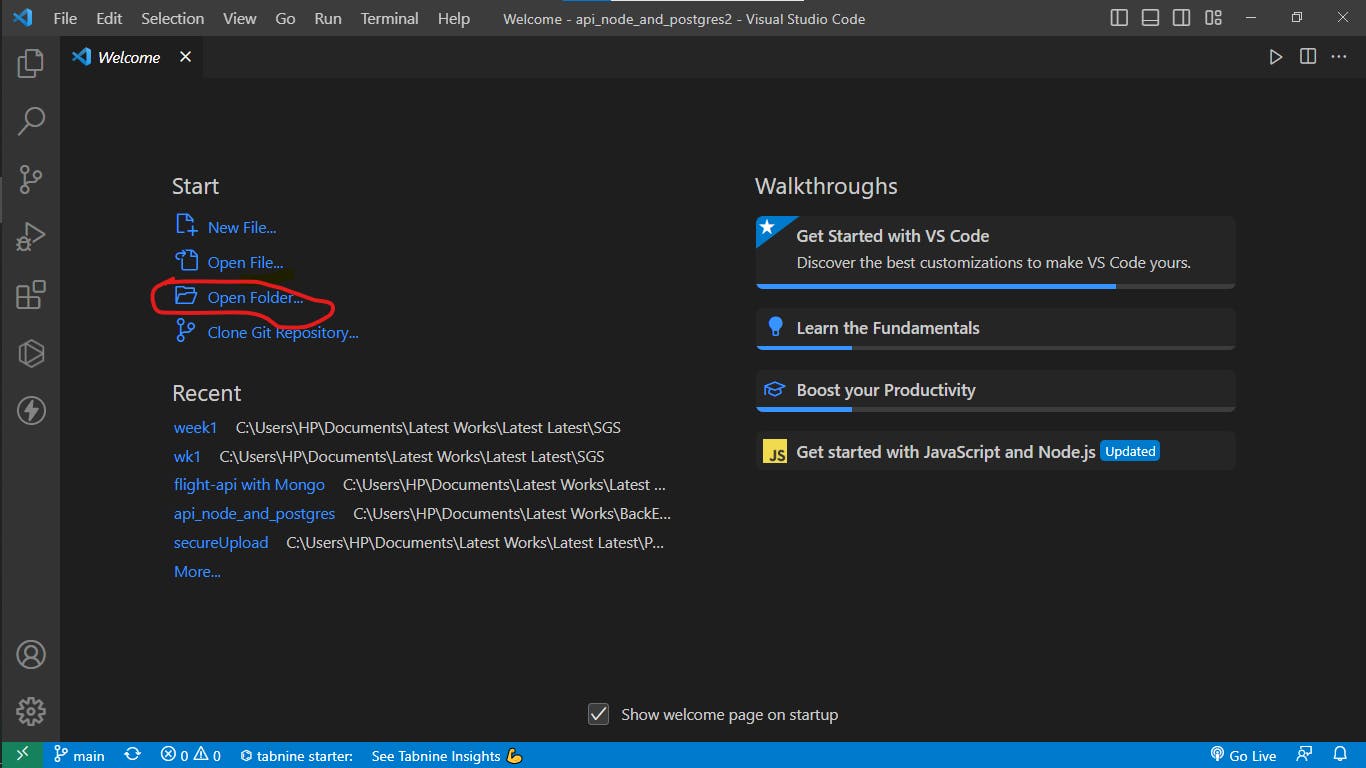
Setup your dev environment If you can't see the terminal like it's visible in the picture above, use
Ctrl + Shift + `to bring it up.
Create a server.js file and initialize a node project Create a server.js file. This is where all of our app logic will be stored.
touch server.jsInitialize a node project. This way, we tell the system that the project will be built with Node and will be able to allow for the incorporation of all internal and external functions.
npm init -yThis automatically generates a package.json file that includes all the descriptions of the project and will auto-update as the project grows.

- Install the necessary dependencies We will be needing
expressandnode-postgres(pg) modules to continue. To install these, use the following command:
- Install the necessary dependencies We will be needing
npm i express pg
After installing, a folder is generated: node_modules. This is where all the external modules installed will be stored and requested from. A package-lock.json file is also generated.

- Write logic for setting up a simple app In your
server.js,write the following:
    const express = require('express');
    const app = express();
    app.get('/', (req, res) => {
        res.send('Simple API homepage');
    })
    app.listen(5070, () => {
        console.log("Server running on port 5070");
    })
To run this simple app, input the following command in your terminal:
node server.js
In your console, you'd see the text that shows that the app is running on the port designated.
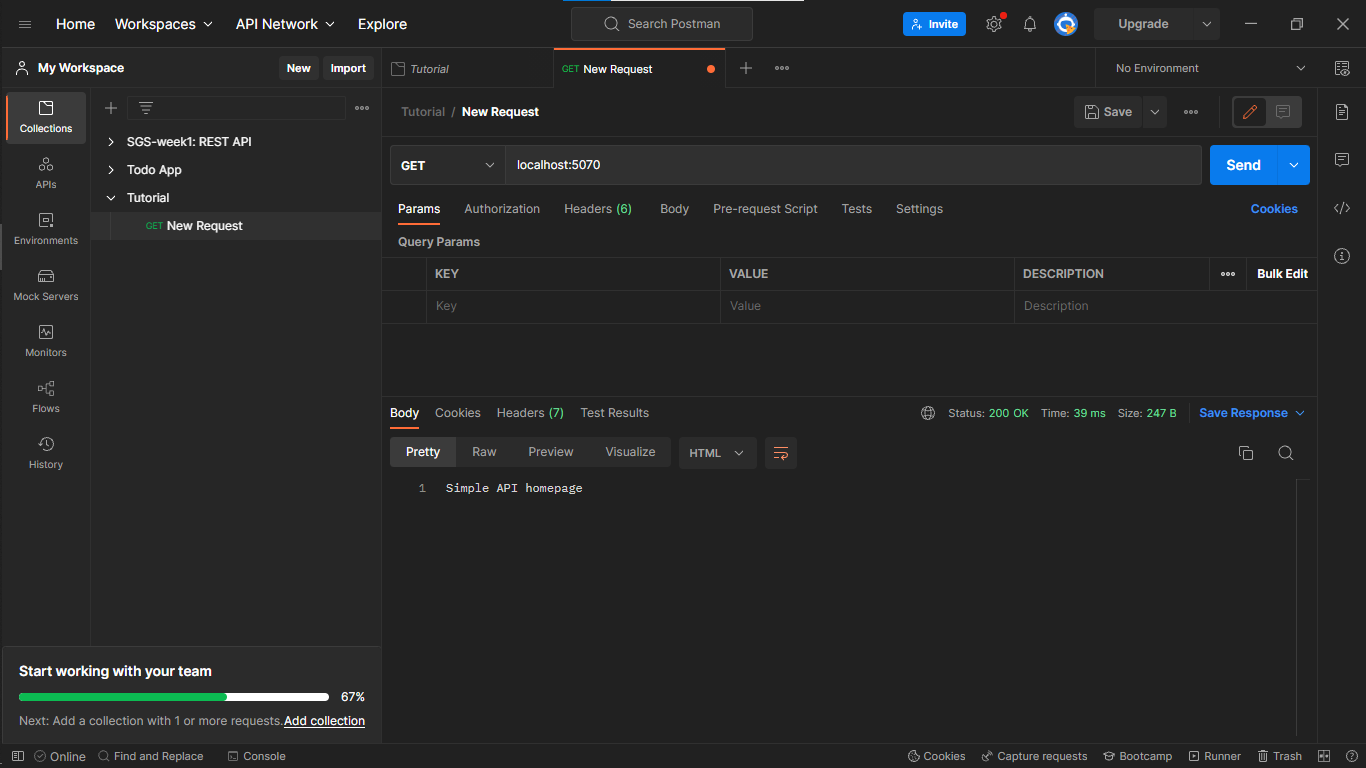
- Test the app you just started using Postman, send a request to the port that you designated
GET localhost:5070
- Go ahead to create the routes to perform different actions To read from a database, we need to create a route(/path) in which a request will be sent. The same will be done for requests to add certain data to the database. We will use the following code piece to achieve that:
    app.get('/api/items', (req, res) => {
        res.send('Sending a list of items from the DB ...')
    })
    app.post('/api/items', (req, res) => {
        res.status(201).send('Sent the new data to the DB ...')
    })
Make sure to restart your server to test this. Use Ctrl + q to stop the currently running server. Restart your server and test the routes again on Postman
GET/POST localhost:5070/api/items
Good job so far! We have our simple app set up. Let's work on our database.
Creating a Postgres Database on Render
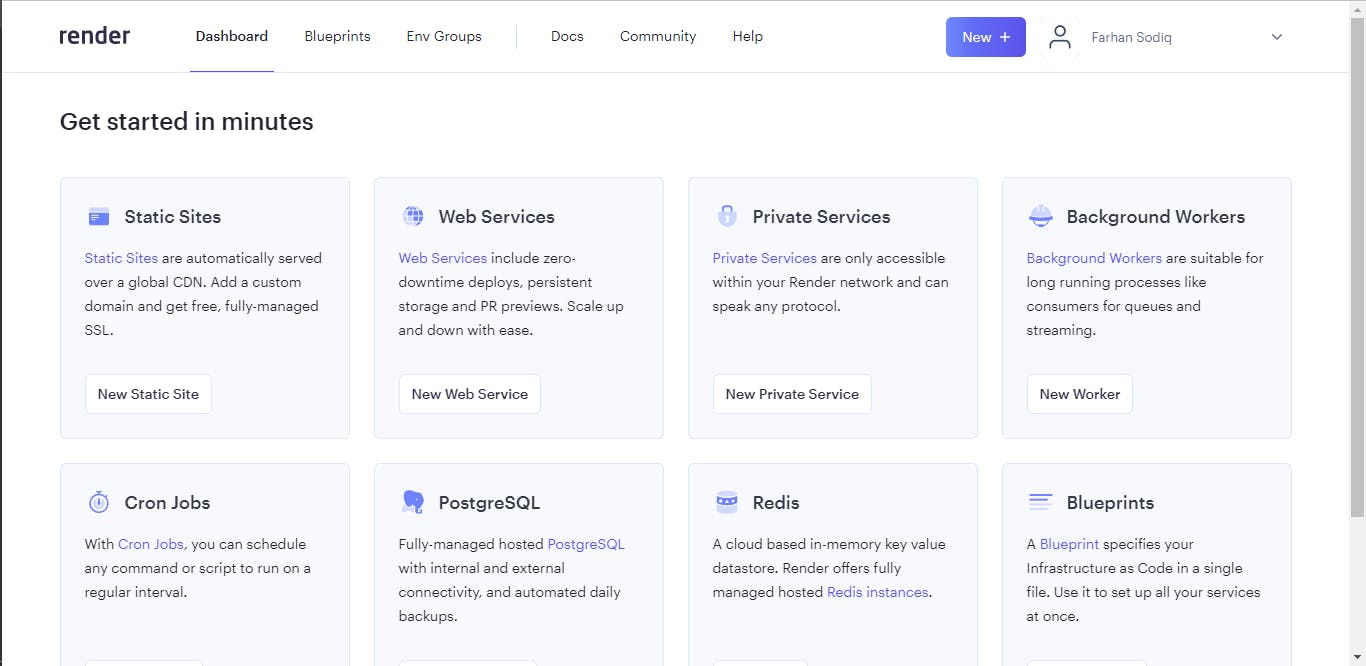
- Remember our dashboard on Render? You'd see an option to create a PostgreSQL DB.

Click on "New PostgreSQL" inside that section. On the next page, you'd be able to set up your database. Input name, database name and user. You can find out more about each question by hovering around the "i" icon by the side of its label. Don't worry about the "Datadog API key". Click on "Create Database". You'd be referred to another page and it may take a little while for the database to be completely set up.

- Create a table in the new DB after creating the database, the next thing will be to create a table in which data can be sent to and read from. To do this, you would need to download and set up PostgreSQL on your local machine. Check out this article on Installing Postgres by Codecademy.
Search for psql (SQL Shell) in your list of programs. Then you'd get prompts to input certain parameters.
- Connect with psql At the top right corner of the Database dashboard on Render, you'd see the "Connect" button. Click it and navigate to the "External Connection" section

You'd get a text similar to this:
PGPASSWORD=<password> psql -h <hostname> -U <username> <databasename>
Compare accordingly and crop out the different values to input in your psql terminal. Note that the port remains the same: 5432 and while putting in the password, it will be invincible.
After connecting, use the following command to see if your connection has been established:
\conninfo

- Create Table Write a query in the psql terminal to create a table:
CREATE TABLE items (
 ID SERIAL PRIMARY KEY,
 description VARCHAR(255)
);
This will create a table with 2 columns ID and Description, for each item added to the DB. You can go ahead to use the following command to view the table you just created:
\dt

Yep! We are done with our database and table. Let's integrate.
Connecting the NodeJS API with the Database
It's time to connect our app with the database so that it can get data from the DB and also sent data to it.
Create a new file:
DBConfig.jsCheck the database dashboard on Render again and go to "Connect" and copy the link for "External Connection". It'd be similar to:
postgres://<username>:<password>@<host>/<database>
Since we will be deploying this project later on, we need to hide this link as it is a very important info. Install a dotenv module.
npm i dotenv
And afterward, bring it into the server.js file and use it like this:
const dotenv = require('dotenv');
dotenv.config();
This will allow the different files in the project to access all variables in the file created. Then, create a .env file and save your connection link in it
DBConnLink=postgres://<username>:<password>@<host>/<database>
Now we are ready to build our Postgre connection function in our DBConfig.js
const { Pool } = require('pg');
const itemsPool = new Pool({
    connectionString: process.env.DBConfigLink,
    ssl: {
        rejectUnauthorized: false
    }
});
module.exports = itemsPool;
- Use the function to read and send items into the database Import this function into your server.js
const itemsPool = require('./dbConfig');
And modify your former routes accordingly, as shown below:
app.get('/api/items', async(req, res) => {
    try {
        const allItems = await itemsPool.query(
            'SELECT * FROM items'
        );
        res.json({ allItems });
    } catch (error) {
        console.log(error);
        res.status(500).send(error.message)
    }
})
app.post('/api/items', async (req, res) => {
    const { description } = req.body;
    try {
        const newItem = await itemsPool.query(
            'INSERT INTO items (description) VALUES ($1) RETURNING *',
            [description]
        );
        res.json({
            message: "New item added!",
            item: newItem.rows
         });
    } catch (error) {
        console.log(error);
        res.status(500).send(error.message)
    }
})
Note that you will need to add a middleware to your server.js, to be able to get the body of the request sent by the user. Add the following line of code just after the line where you created an app instance from the express module. Like this:
const app = express();
app.use(express.json());
Your codes so far in the server.js would look like this:
const express = require('express');
const app = express();
app.use(express.json());

const dotenv = require('dotenv');
dotenv.config();

const itemsPool = require('./dbConfig')

app.get('/', (req, res) => {
    res.send('Simple API homepage');
})

app.get('/api/items', async(req, res) => {
    try {
        const allItems = await itemsPool.query(
            'SELECT * FROM items'
        );
        res.json({ allItems.rows });
    } catch (error) {
        console.log(error);
        res.status(500).send(error.message)
    }
})

app.post('/api/items', async (req, res) => {
    const { description } = req.body;
    try {
        const newItem = await itemsPool.query(
            'INSERT INTO items (description) VALUES ($1) RETURNING *',
            [description]
        );
        res.status(201).json({
            message: "New item added!",
            item: newItem.rows
         });
    } catch (error) {
        console.log(error);
        res.status(500).send(error.message)
    }
})

app.listen(5070, () => {
    console.log("Server running on port 5070");
})
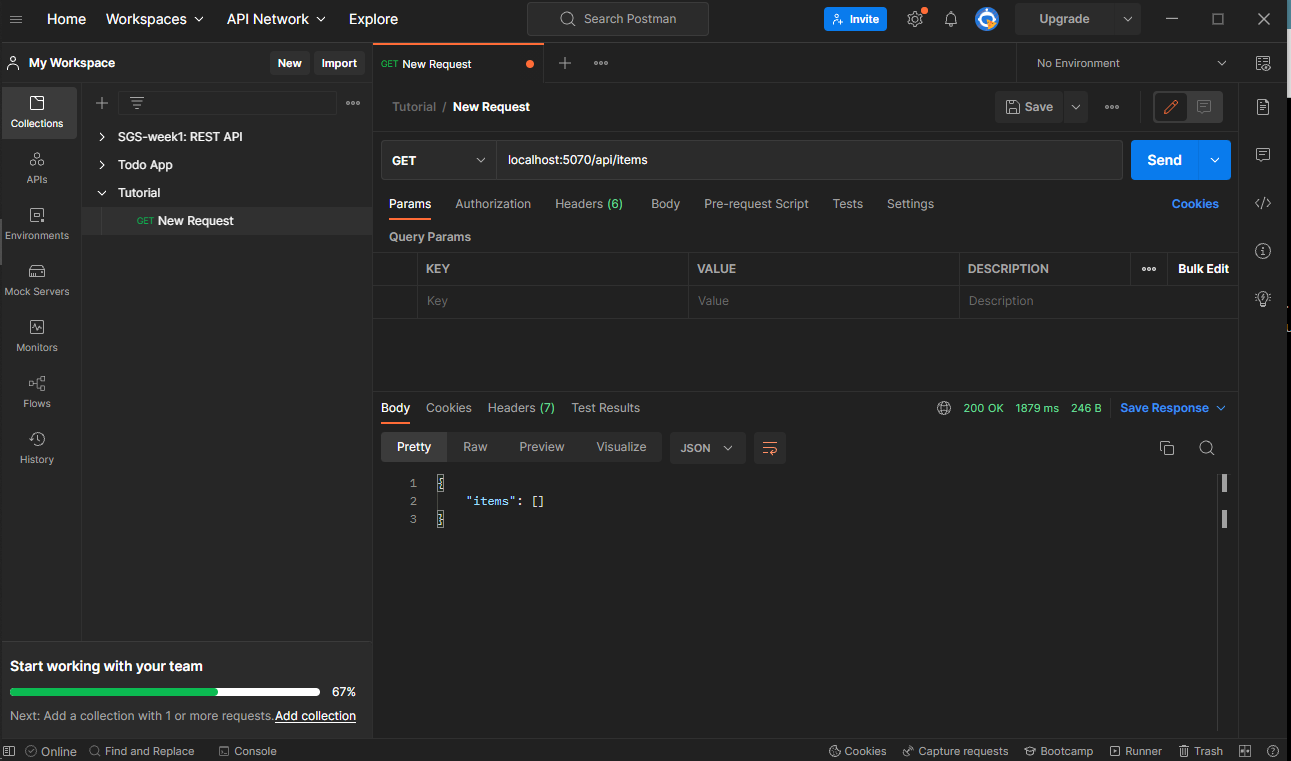
- Restart your server and send requests on Postman Sending a GET request initially will bring an empty array of values since our table is currently empty
Then, make a POST request to insert a new record into the DB. Make sure to include a body. Change the format to "raw" and choose "JSON" option, as shown below

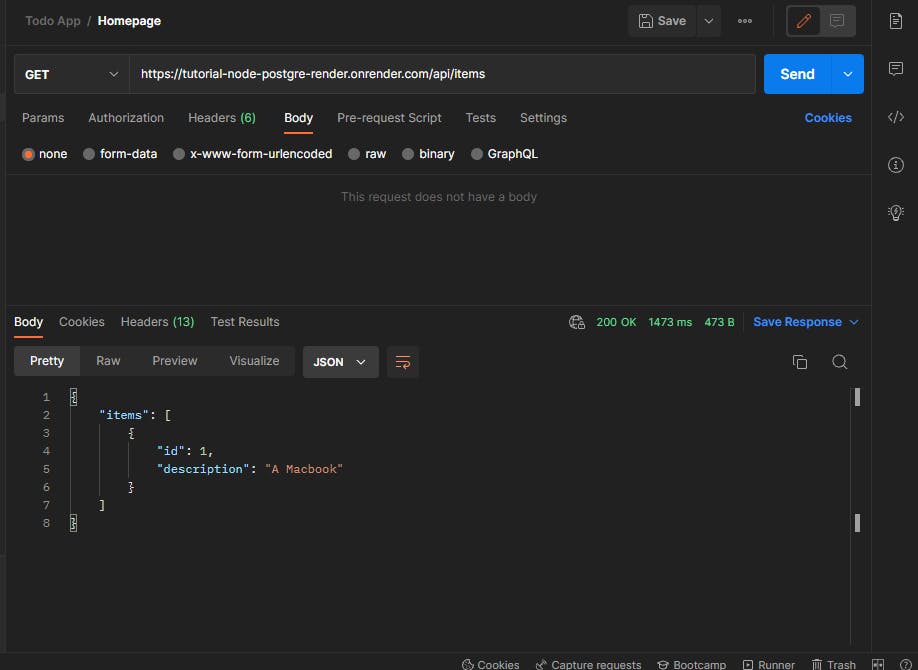
Sending a GET request again will bring the item that we just added.

Yay! Our application is well connected to the database on Render, and can send to and read from it. Time to deploy the entire thing.
Deploying the entire project on Render
To deploy your project remotely, you need to first push your code to a remote platform like GitHub, where Render can access the resources and then deploy them to be publicly available. If you would like to know how to use Git and GitHub, check out the course on Codecademy.
This means that, from here, it is assumed that your codes are now available on GitHub. (You can find mine here, on GitHub.)
Remember to add a .gitignore file and ignore the node_modules folder and the .env file.
Create a web service on Render
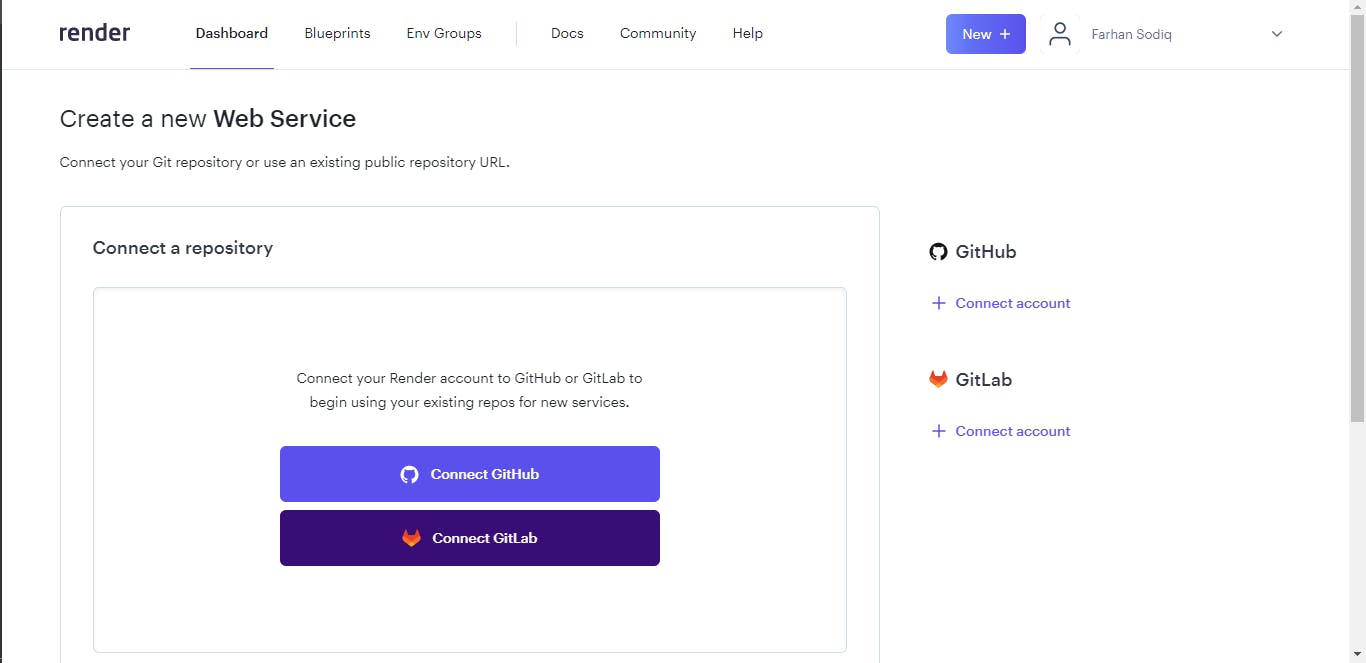
The last time we created a database on Render, this time, we'd be deploying our Node app itself. Go back to your Render dashboard and click on "New". Then select "Web service".

Connect your GitHub (/GitLab) account
After connecting, your dashboard would look like this:
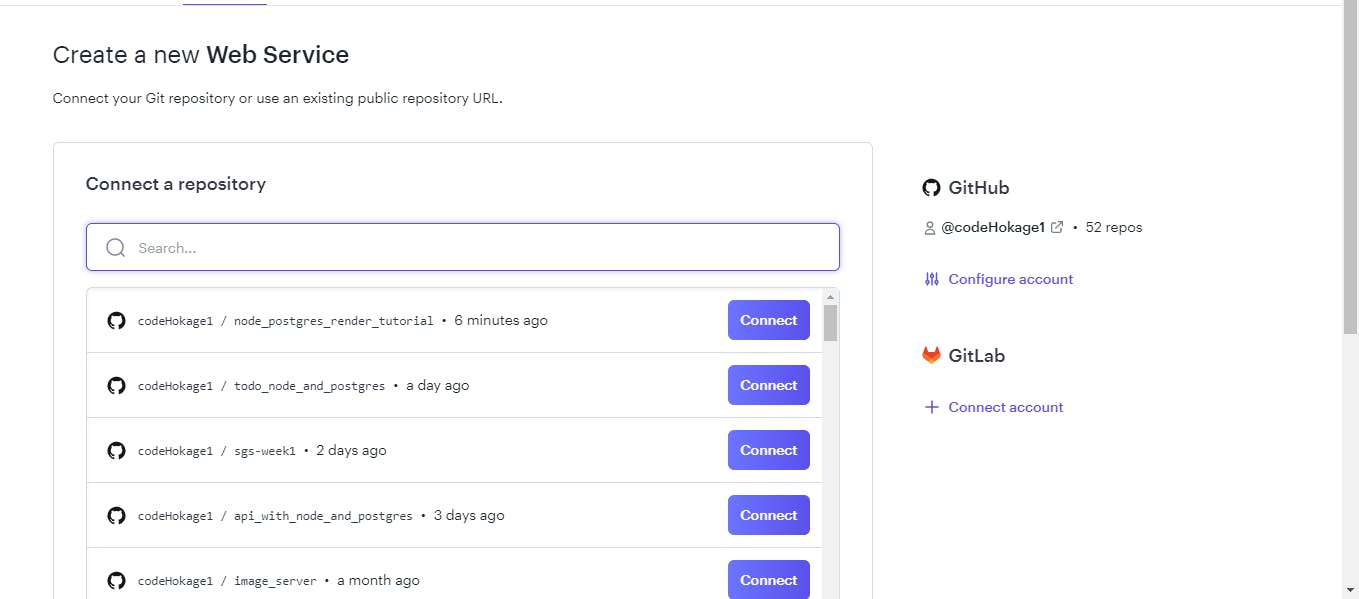
Then, you can click on the repo that you want to link in.
Set up your project on Render.
Ensure to give your project a simple name. Leave everything else as default values. Scroll down to the bottom and click on "Advanced" to set our environment variable: DBConfigLink; since we already ignored the .env file, while pushing our codes.
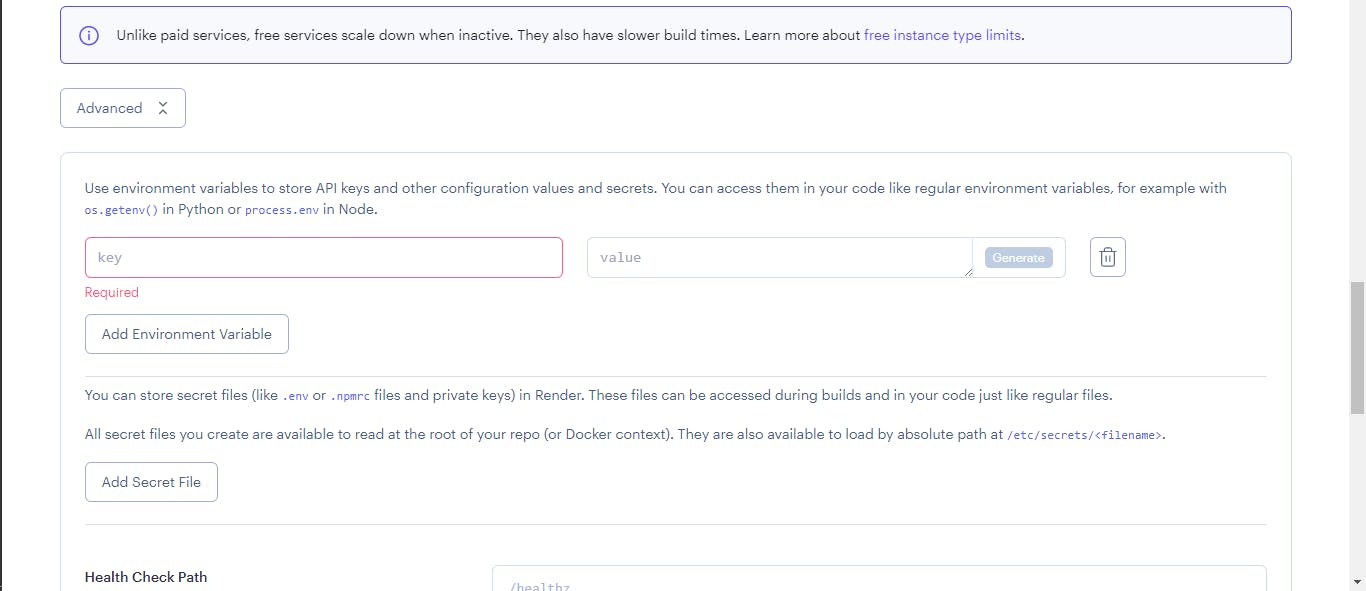
"DBConfig" is the key but the link will be different from the one used while testing on your local machine.
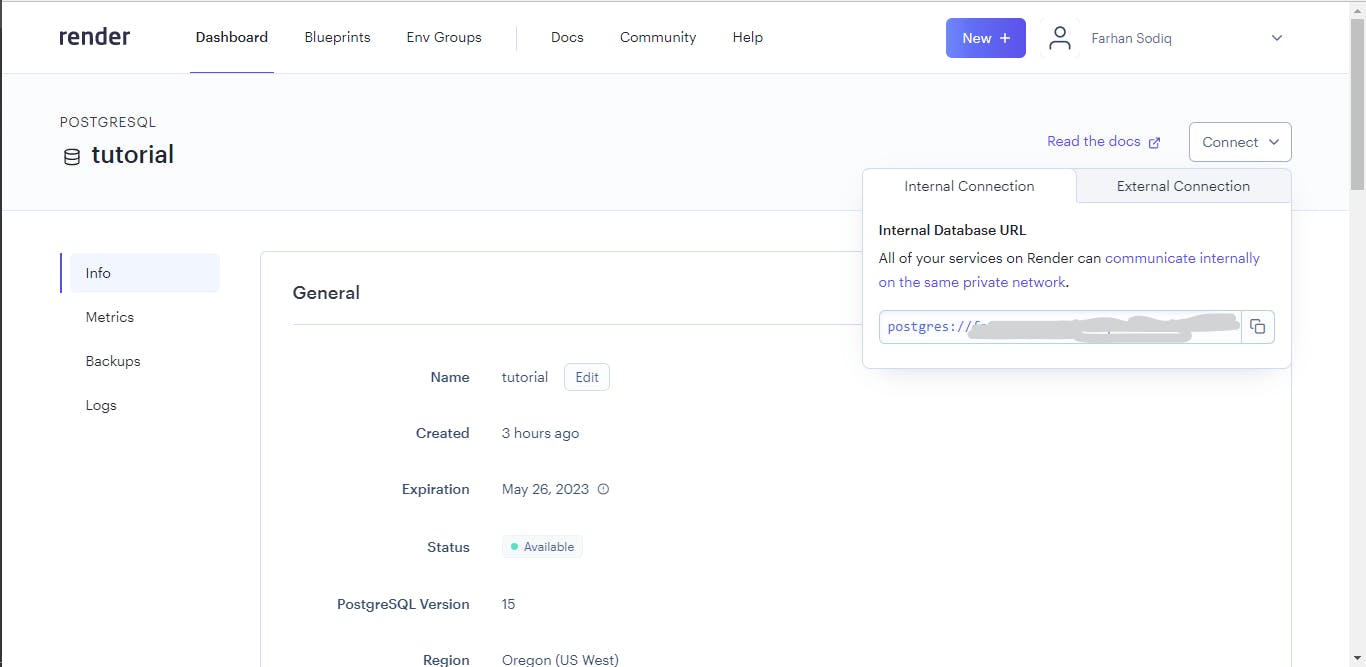
Go back to your database dashboard, click "Connect" and then copy the link for the "Internal" connection. Because now, both the database and the node app are on Render.
Afterward, click on "Create Web Service"
This may take a short while to build. But as soon as it is done, you'd get a link to the app as well as the info about the deployed app.
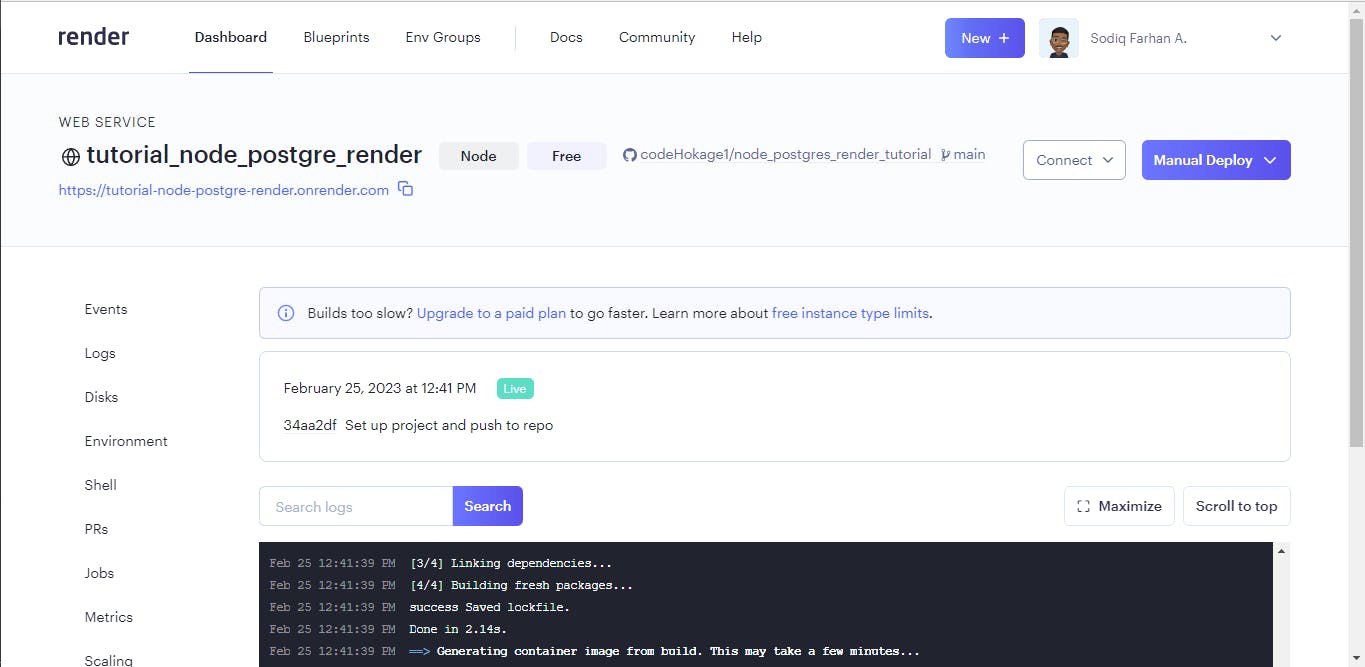
The link to my own deployed project is: https://tutorial-node-postgre-render.onrender.com/api/items
You can check it! Make sure to test your deployed app with Postman just like you did while developing.
All done! Now we have our Node app connected with our Postgre Database and we can keep expanding.
I really do hope that this article is useful and will be open to collaboration and/or for questions and discussions regarding this project and/or any other similar thing. You can reach out to me via email (farhansodiq360@gmil.com), Twitter or GitHub
Cheers!